How to Create a New Network Design
Use this guide when you need to create a brand-new design from the ENP interface.
Before You Begin
You should already be logged in to ENP and be able to access the Topology View.
Step 1: Access the File System Panel
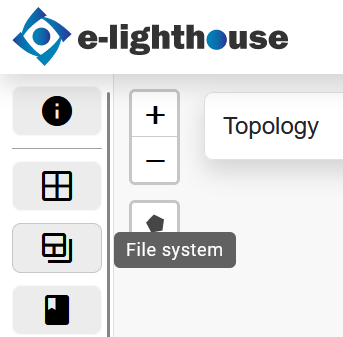
To begin, open the File System view from the top toolbar of the Web Client. This is the entry point for creating, managing, and importing network designs.
Step 2: Open the New Design Creation Modal
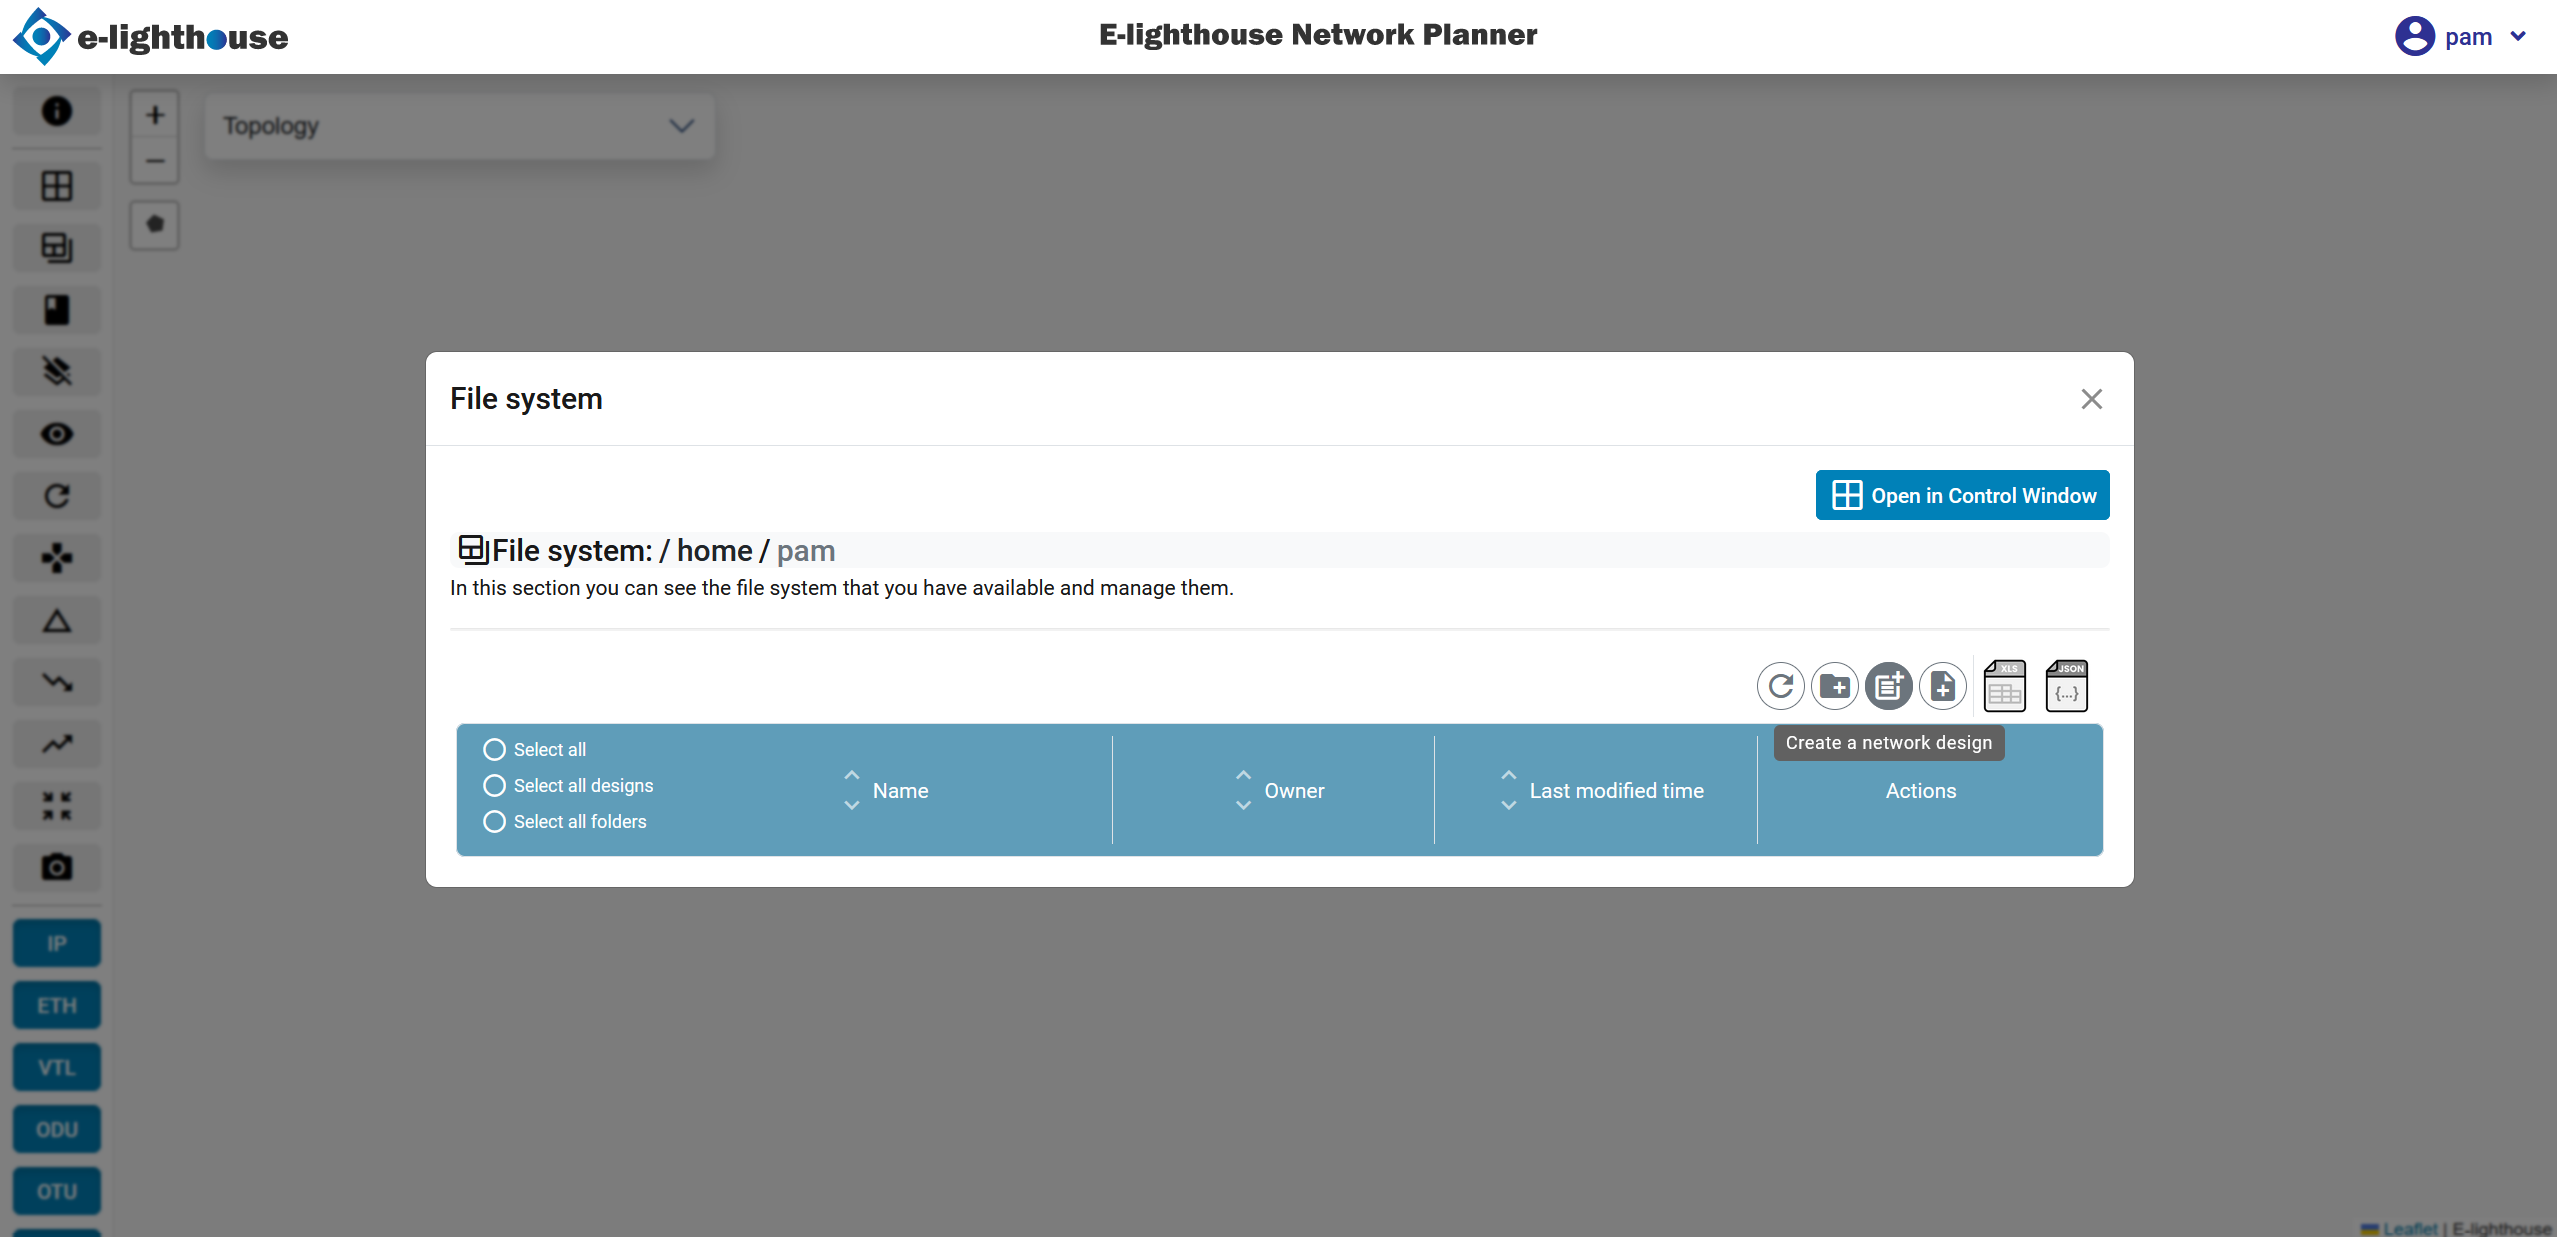
Click the File System button to open a modal dialog window. Alternatively, you can reach this section from the Control Window.
With the modal open, locate the Create a network design action.
Step 3: Complete the New Design Form
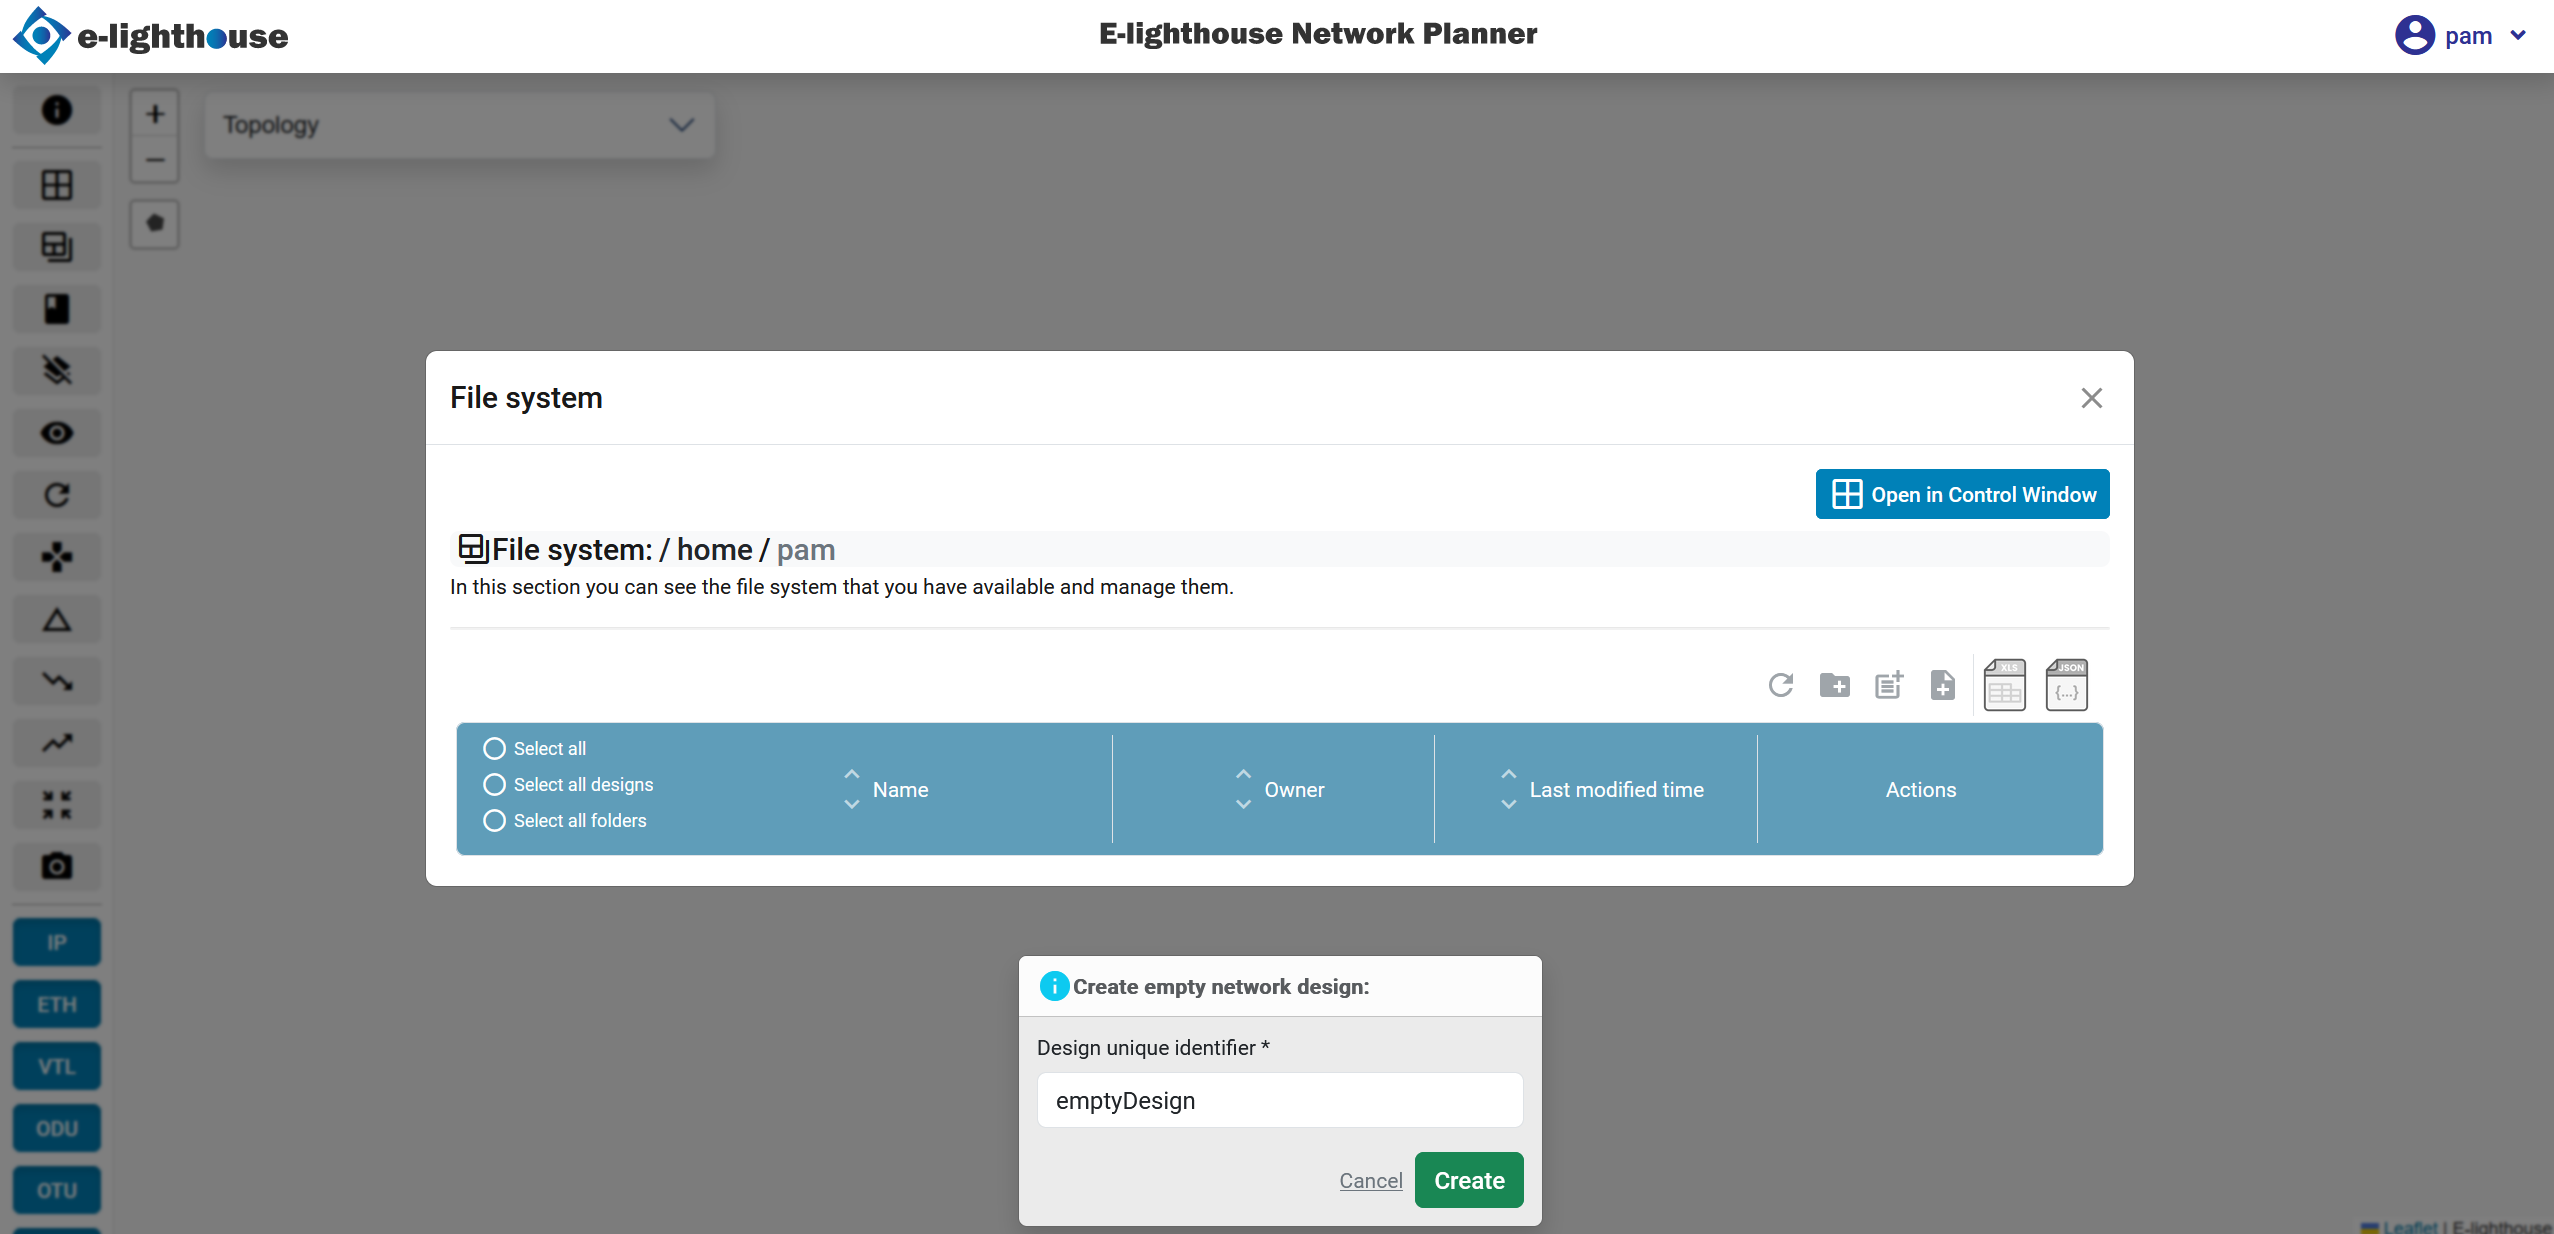
After selecting the action, a form appears. Fill in the required details such as:
- Design unique identifier: the name used to identify the design
Step 4: Confirm Design Creation
After completing the form, submit it to confirm creation. The system will generate a new design environment, and a confirmation message will appear.
Step 5: Load the New Design
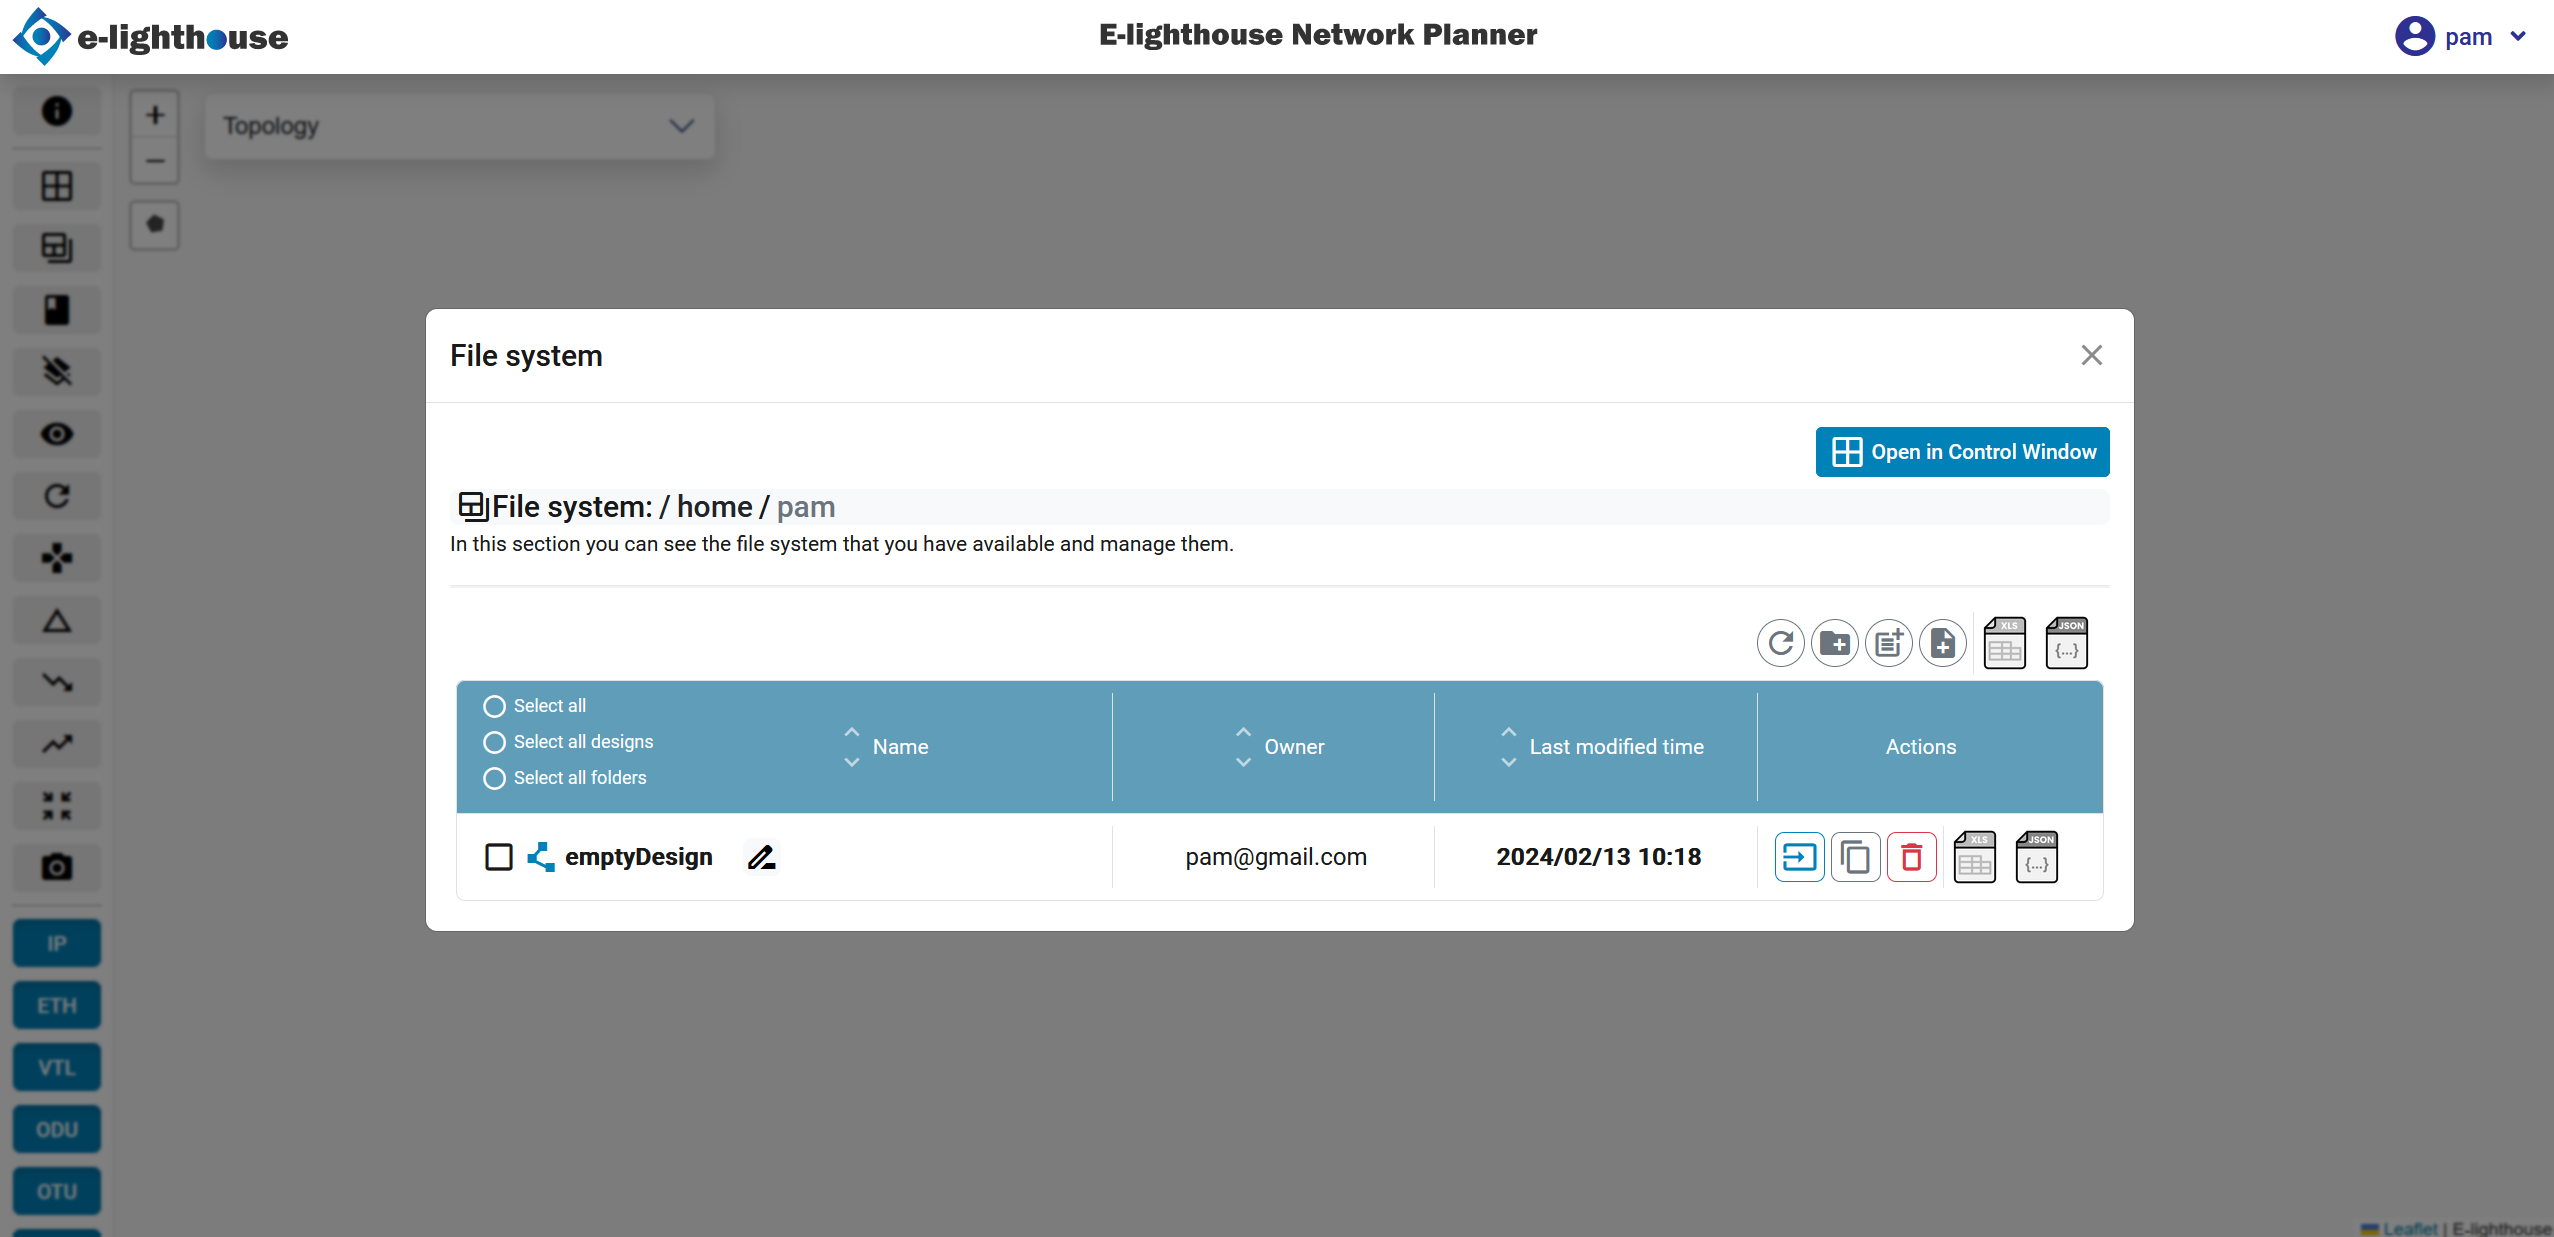
Once the design is created, the file system view will refresh, and the new design will be listed. Click on the design name to load it into the Topology Window.
What You Should Check
- The design appears in the file system list.
- The design opens in the Topology View.
- The top menu now shows the current design name.
Recommended Next Step
Continue with: